

Closet Barn Door Project with National Hardware
A special thank you to National Hardware for sponsoring this blog post. All opinions are my own. #NationalHardware
Welcome back to our entryway as we take on another project. We have enjoyed adding the hall tree to the space, it has been so nice having the proper place to store shoes. Even the kids love putting their shoes away! With that win, it was time to tie the space all together. In our home, we have a small coat closet beside the front door when you come in. I knew it would be fun to eliminate that boring small door and turn it into a statement piece.
To make the process super easy, we got the help of my friends at National Hardware’s barn door kits like N700-005. Now we can easily transform a boring typical door to a fun statement piece. Their 927 Designer Interior Barn Door Kit (stock # N700-005) in matte black brings so much to the space. Not to mention all of the amazing architectural touches that got added to our entry space.
National Hardware did an amazing job packing their kit. Every piece of the kit has a spot, it came with photographic instructions, and all of the hardware to do this installation correctly. So, let’s hop into this build, who is ready to build a barn door ?!?!
Difficulty: Intermediate
Tools Required:
Miter Saw and Circular Saw
Wood Glue
Clamps
Tape Measure
Square
Drill w/ proper drill bits
Finish
Safety Glasses
Hearing Protection
Gloves
marker
National Hardware STOCK # N700-005
Step 1
Planning a project before you begin is always important. Making sure you are getting the needed design and the proper measurements before cutting a single piece. This is always a great way to keep your project on budget. The first step is to plan your door size based on the instructions in your kit. This is critical before installing the header and track. Believe me, you do not want to take a door down to trim the bottom to allow it to fit. (Personal experience)
Now it is time to gather all the needed materials for your build. Take the time to go over the steps of the installation and take note of all provided parts. Now let's make some saw dust.


Step 2
Material needed:
¾” sheet of flat solid plywood
First step in building your barn door is getting your plywood cut to size. There are a couple of options to do this. You can get your local hardware store to cut down the plywood for you, this is a great option if you do not own a circular saw or table saw. Our local store that sells National Hardware kits also can cut plywood down for you, for a small fee, if you would like them to. Next option is how I completed the cuts using a circular saw with a straight edge.
Setting up the sawhorses, I laid out my door dimensions. Make sure your door is 2” wide than the opening. I started with the height of the door cutting across the width of the plywood. Then I finished up with cutting the length of the board to get the width correct. If you use a sharp blade, you will get an amazing edge.
Our door final dimensions were 31” wide x 85.75”


Step 3
You have the door to size and square, now we can work on adding the decorative design we created now.
Materials needed:
1x4x8’s x3
1x6x8 x1
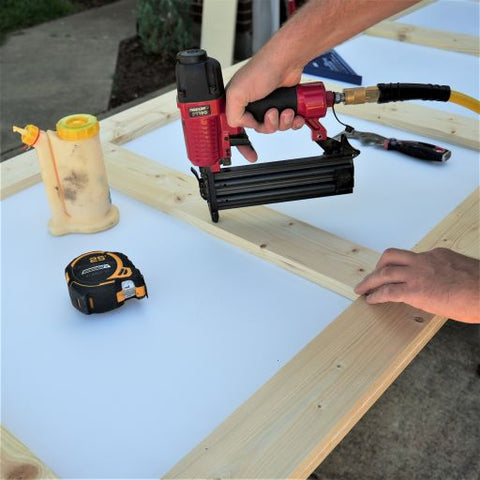
I cut using the miter saw out of the 1x4’s (2) @ 85.75” (3) @ 24”, then out of the 1x6’s (2) @ 24”. Using wood glue and 1.25” 18ga brad nails to install the pattern. You can really customize your design to fit your style. Do whatever pattern you would like; it is up to you. We chose a pattern that will complement our hall tree. Allow the pattern to dry, then go back with wood filler to fill in any voids and nail holes. Sand everything down with 220 grit sandpaper. If you are painting, you can use paintable caulking to fill any voids or cracks as well. We used our favorite white trim/door paint to make sure our barn door matched. Allow the paint to cure and let's move back inside!


Step 4
I went to our local hardware store and picked up a quality 1x6x6 board. The key is to make sure the board is perfectly flat. A little tip is to lay the board flat on the floor and make sure there isn’t any cupping or warpage. Pro Tip! Go ahead and paint the header the color you desire, this will make it easier to touch up after it is hung. Once the paint has dried, we can move to installing it on the wall.
Using a stud finder, take your time and mark all of the stud locations with a light pencil mark. I made sure the marks were above the header so I could see them. Note with their kit, the center of the header needed to be our door height plus 1-⅞” from the floor. Marking a center line on the header, using a level and Samantha helping me hold the header level. I installed it using 3” interior screws through the header and into the studs. Make sure you do not screw any screws where the rail will be mounted. This is a good time to use wood filler on the screw hole and touch up paint.
Now it is time to mount the track onto your header with the supplied hardware from your kit. The center of the track will line up with the centerline of the header. Use a level as your installing to make sure the tracking is horizontal! Follow your instructions to use the proper hardware for this step in your kit. Our kit has four mounting points. I drilled a ⅛” pilot hole to avoid splitting the header during installation. Having a second set of hands here is really important, the rail is heavy, and you do not want to drop it. Now with the rail installed we can move back to the finished door to add the hardware.


Step 5
My favorite part is adding the beautiful hardware on the finished door. It really starts to take shape with all of their amazing pieces! Installing the hanger brackets is made super easy thanks to their handy template! Attach the template on the front of the door using painter's tape. You align it with the top edge of the door and make sure the template is at least 2″ from the door edge. I marked the center of the holes to drill and got busy! Repeat all of these steps on the other side of the door!
First, I drilled a ⅛” pilot hole, then followed up with a 7/16” drill bit to finish. Using a square, the bolts run through the back, the nuts will be shown on the front of the door. DO NOT OVERTIGHTEN the hardware!
After you have your hangers installed, it is time to install the anti-jump disc on the top edge of the door. You need a minimum of 2″ away from the inside edge of the hanger. Make sure the mounting hole is closest to the front of the door. Do the same steps on the other side of the door. On this door we decided against a Pull, if you want to add a pull now is the time. It makes it a lot easier when it is lying flat.


Step 6
This is probably the most nerve-wracking part of the process. You have prepped the wall, and you have poured your heart and sweat creating an amazing door. Now it is the time to see all of that hard work pay off! It is time to hang the door. First you rotate the anti-jump discs out of the way when placing the door on the track. Then Samantha and I picked the door up and set it on the track. We slid the door back and forth (do not run off the track) and made sure it had smooth operation. Rotate the anti-jump disks back into place. Take a moment and have a small victory celebration, you have made your very own barn door!

Step 7
Keep your door moving smoothly by installing your floor guides. There are several choices available here. We went with the wall mounted floor guide. One of the most important steps to make sure your door does not fly off the track is installing the door stops. Slide the door to the closed position so it overlaps the opening by 1″ on both sides. Slide the first door stop onto the track so it touches the door. Tighten the set screws to secure it in place. Slide the door to the open position so it overlaps the opening by 1″. Follow the same steps to install the other door stop.

Step 8
If your barn door kits come with soft open and close attachments, now is the time to install them. If you take your time and follow each step, it will be so easy to install.

We are loving how this barn door looks in our entryway! We love how the door fits in the space and how we took something boring like the plain old closet door and turned it into something cool.
With National Hardware's amazing barn door kits, and the easy-to-follow instructions, you can make your barn door vision come to life. The key is to make sure you install the header and the rail level. If the rail is not level the door will move to the left or right on its own. Make sure you get a flat quality piece of ¾” plywood like birch and use their template when installing the hangers. If you do these steps, you will have a professional door without the professional price. So, let’s get out there and make some saw dust. Let’s make our home ours! As always, thanks for reading and stay classy!
katrina kroeplin on
putting one in for our den is on the list that i want to do. im sending this to my hsuband right now
Angela Ricardo Bethea on
What an informative post and enjoyed the journey of building it from start to finish. The result looks absolutely amazing!
Lynndee on
I’ve been loving the modern farmhouse look. And that barn door looks nice. Great job!
Zena's Suitcase on
This is such a great looking door. The hardware finishes really make it
Everything Enchanting on
Wow, it looks really great! This DIY project looks cool, but I know it’s not that easy to do 😒. I need to check out National Hardware’s kits. Thanks for sharing the detailed step-by-step tutorial.
Star Traci on
My husband and I are interested in doing a project like this, but I just worry that we are not at this level. you did an amazing job, however.
Beautiful Touches on
I really like this style of doorway, is it easy to forget that it is set up like this sometimes though? I can imagine it also being really easy to forget, myself, and clamoring into it trying to push or pull!
laura on
I love barn door; they make the space so beautiful. Since I grew up on a farm this is something that I always wanted to have in my home.
Renee on
I love the look of the hardware. The door seems pretty straight forward to put together.
Telina on
I love how the project turned out — the barndoor looks amazing!
IceCreamnStickyFingers on
I would love to add barn doors but there just isn’t any room to do it in my house. I am planning on painting my doors black soon.
Monica Simpson on
I want this for our hall closet! I can’t stand our door constantly coming off when we open it.
Catalina on
I think this is an awesome idea. And I found the perfect solution for a door in my house!
Richelle Milar on
I think this is perfect on our pantry area. This is so awesome I’m gonna let my husband see this!
forever my little moon on
I love how it turned out! I bet it’s super easy and convenient to use too.