

How to add hanging hooks to your space with National Hardware
Our entryway into our home was needing some character and storage options for our family. Adding in a hall tree design and some hooks was the perfect solution. It’s the perfect addition for hidden storage and our jackets for fall. The final touch was adding some @nationalhardware REED Modern Hooks.

They have a beautiful and modern design. Each one has two hooks so you can maximize hanging space which I love!
The tutorial is great for any area of your home or office that you are needing to add stylish hanging storage for coats, purses, hats, accessories and more. With just a few steps, adding the REED Modern Hooks to your project is sure to help you organize while adding a touch of style too! I would love to add these into a bathroom as well as towel hangers. Where would you like to add some hook storage? Let me know in the comments below!

Difficulty:
Beginner
Team members needed:
One - Yourself
Time for project:
30 Min
Tools/Supplies:
- National Hardware REED Geometric Hook (STOCK # N337-918)
- Drill
- Drill bit (⅛ inch)
- Measuring tape
- Phillips head Screwdriver
- #4 Flathead Wood Screws

Step One:
Planning the project-
To begin, we gathered some tools and got a general idea of where we wanted to hang the hooks. The REED Modern Hook comes in a kit complete with one hook, a base and two anchors. Depending on the surface you are installing the hooks on will determine if you need to use the anchors. For this step, you would simply decide where you would like to see your hook(s) installed. Hold a hook in the space to see if this is the right height or position for the hanging intention. Consider the length of the items you will be hanging on the hooks once completed. For example, the length of a coat, bath towel, accessory, etc.

Step Two:
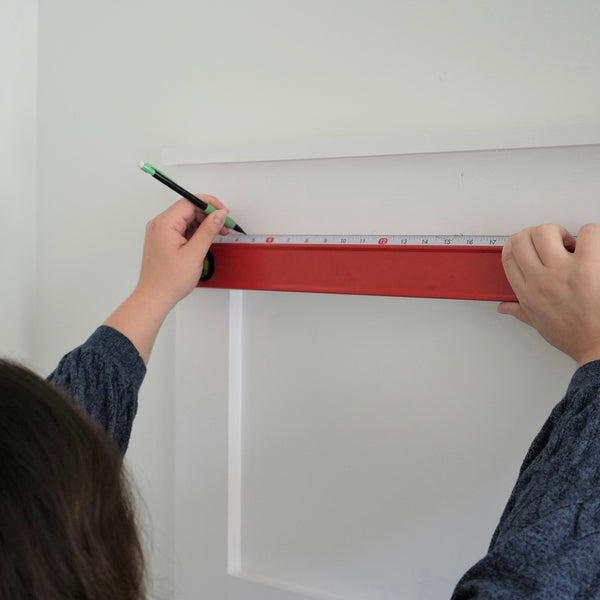
Marking the spot-
Once I had the spot figured for the hook, it was time to make the mark. In my case, I have four hooks that I need to level and space accordingly. Using the level, I factored every 15 inches to mark for my top hole on my hook base.
Step Three:
Pilot holes-
Depending on the surface you are installing on, you may use anchors or simply move into the pilot hole step. For anchoring into drywall, you would NOT need pilot holes. Please use the anchors provided in the kit and install them now.
For anchoring onto a wood surface, like I did on our hall tree, you would now use an 1/8inch bit and proceed on all marked spots to create a pilot hole. Once all holes are created or anchors installed, please begin the next step.

Step Four:
Mounting the base-
Now I began to secure the base with screws. If you used the drywall anchors, you will use the screws provided in the kit for the anchor. If you are installing on a wooden surface, use #4 Flathead Wood Screws and screw into the top space on the base. Once all bases have been secured with the first screw, use this moment to make sure they are still level and straight.
To secure the bottom part of the base, repeat the pilot hole steps and install the bottom screws.


Step Five:
Installing the hook itself-
With the bases installed, I was ready to attach the hooks. Starting at the top of the base and bottom of the hook, I slid it onto the track of the base. It felt snug and almost clicked into place. They should not feel wiggly or loose but if you should need to, you can slide them up to remove them off the base again. Now the project has started to really take place!


Step Six:
Using your hooks-
I was now complete with the install of the REED Modern Hooks. I love that these hooks are rated for an up to 25 lbs weight limit. That’s amazing and gives so much usability! There are two knobs on the hook, one above the other, giving you the ability to hang multiple items on one hook. We are excited to have this little space to store our coats, hats, and fall or winter accessories as it gets colder.


Tammy on
I love those hooks and they would go with so many different types of decor.