

Take the squeak out of your door hinges with National Hardware
This blog is sponsored by National Hardware
We have lived in our home for almost 6 years. It was built in the early 2000’s and it still has some remaining 90’s brass in it. This project is one I have been wanting to do for a long time. Our doors and frames needed some much-needed painting too. It was a great time to do these projects and get them finished up. This is such a fun and easy way to add some character to your door. With a little bit of time and patience, this is such a rewarding process.

National Hardware offers so many different types of door hinges. In different designs and finishes to fit your design. I was super pumped about the Squeak Guard Hinges. Having kiddos this would have been so handy when they were little. There is nothing worse than laying your baby down, trying to close the door, and that annoying squeak happens! Their Squeak Guard Hinges have a lifetime warranty. They are rated for 50lbs per hinge and the amazing matte black finish is perfect for what we are going for. They say they can give you 30 years of squeak free living if installed correctly and with medium use, my mind is blown! Let’s get into this install, it really is simple I promise!
See below the tools and materials needed:
Time: 1-2 hours
Tools Required:
Pencil
Drill w/ ⅛ wood bit
Philips Screw Driver
Chisel or Dremel
Safety Glasses
Hearing Protection
Gloves
# N830-446
Squeak Guard Door Hinges
1/4 In. Radius Round Corners
Are you ready? Let's go!
Step 1
The first step for me is taking down the old doors. Samantha would hold the door while I took all the screws out of the hinges on the door frame. It really makes it easier when you have two people. We had a set of sawhorses setup in the driveway ready to go, so once we had the door unattached, we could take it outside for paint. I would go ahead and clean the door and add a fresh coat of paint to the top side.

Step 2
While the top side was drying, I would go ahead and take the hinges off the door and disregard. Once the one side of the door is dry, I flipped the door to be able to paint the additional side. These doors look totally different with a fresh coat of paint!
Step 3
Once the door has dried now it is time to get those new hinges out of the package, don’t lose any screws (I always hate when that happens). We went with a little different shape, so the next few steps you may not have to do if you get the same hinges that are installed on your door. Using a sharp pencil, trace out where the new hinge will go, use the existing mounting holes as a guide! Take your time here to make the next steps easy.


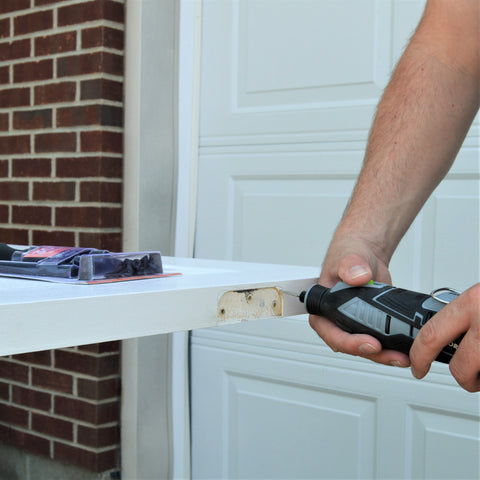
Step 4
Now it is time to remove material on the door to allow for the new hinge to fit. Like I stated in the previous step, you may be able to skip the next couple of steps. Two options that I have done in the past is using wood chisels or a Dremel tool. Either one can accomplish this task extremely well. For this project I chose to use the Dremel tool. Using my line as a guide, with my Dremel set on a medium speed I gently carve out material working to the line, not starting on it. This way I would eliminate the possibility of error. I would occasionally stop to see if my hinge was fitting to make sure I am not eliminating too much material. If you take your time on this step you will have a snug and perfect fitting hinge. Repeat this step for the other hinges on the door.
Step 5
Let's move back inside to prepare the door frame for the new hinges. Before marking and trimming for the new hinges, I took the time to paint the frame. It looks so good now! Take the new hinge, line up the screw holes, and trace around it with a pencil. Remember you may not have to do this step if you are replacing the existing hinges with the same shape! That same patience you used on the door hinges will be just as important when you trim the frame. If you take your time here, you will get a better product! Using a Dremel or wood chisels to trim the extra material will allow for the new hinge to work. I like using my Dremel at medium speed and working up to the line. Stopping several times checking my progress with the new hinge.


Step 6
Now it is time to see all your hard work pay off with an amazing looking door. After you have trial fitted every spot to insure fit, now it is time for the fun part, installation! I first install the hinges on the door itself. Make sure you install the hinges the correct way. Do not install upside down like I did the first time. Then with a buddy, line the door hinges up with the notches on the door frame, start installing the screws. Take your time so you do not scratch your new hinges. This would also be a good time to install new doorknobs if you really want to transform your door.


That wraps it up my friends. It is a really easy way to upgrade your hinges to be squeak free and to give a more modern look. If you take your time, you will really upgrade your doors and have an amazing hinge that can last a lifetime.
Let me know in the comments what you think! I have so many more amazing projects coming your way. Thank you so much for reading and as always stay classy!

LisaLisa on
Ugh, we need to desperately do this to our door. I hate hearing that squeak at night.
Tara Pittman on
I will share these tips with my husband. We have a squeaky back door.
Amber Myers on
Oh cool, I need this for one of my doors. It can be pretty squeaky.